Tag Archives: Recycling

Eco-Saturday: Buy used furniture

Used furniture is one of my favorite forms of recycling. While I purchased a couple of new pieces during my big redecorating project last year, much of the furniture in my house was used when I got it.

My coffee table and end tables came from the Herrin City Library, which sold off or threw out much of its original furniture during an expansion many years ago. The clock in my bedroom came from the same source, and I think that might be where Mom picked up those great lamps that grace the end tables, too.

This cute mid-century bookshelf came from an antique shop on Main Street here in Cape. I expect it will hold up considerably better than the 3-year-old particle-board shelves it replaced:

shelf1

I went looking for mid-century dining furniture at Annie Laurie’s but wound up falling in love with this uber-’70s table and chairs, which came with an extra leaf:

table

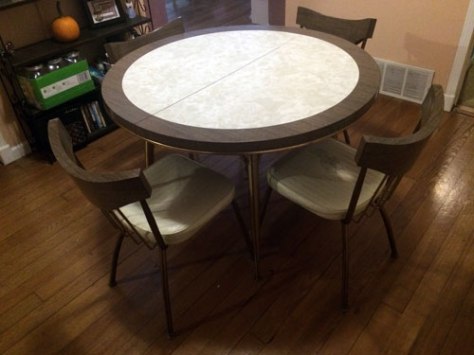
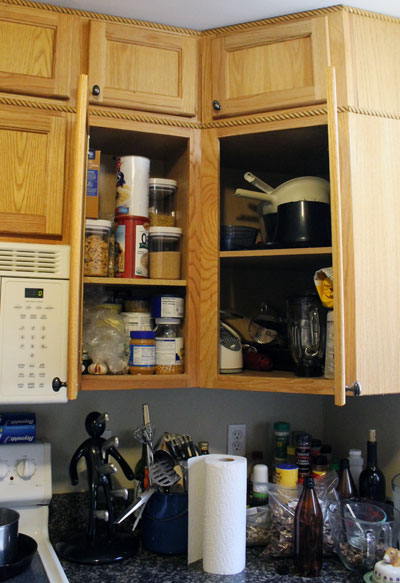
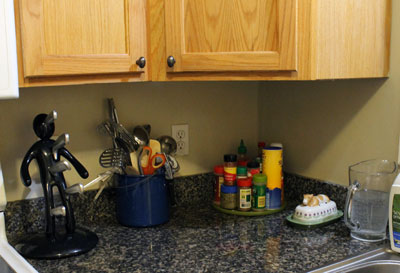
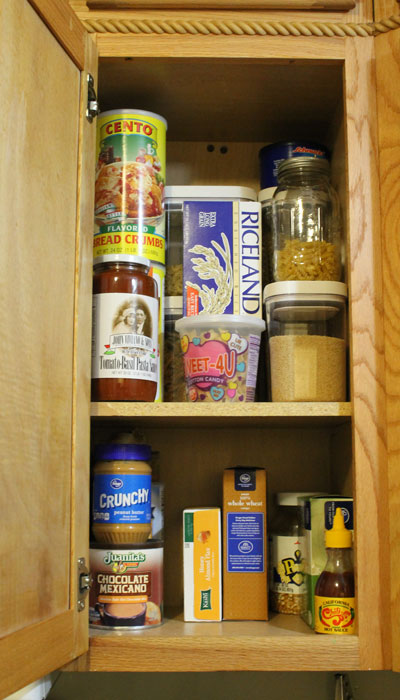
The set was too cool to pass up, so I bought it and declared the dining room a ’70s zone — a look I punctuated with a metal faux-woodgrain shelf I found hiding under a layer of unfortunate contact paper at a little shop on Spanish Street:

shelf2

A can of WD-40 and a little patience yielded a nice nostalgia trip, as Mom displayed her houseplants on similar shelves when I was little. Mine serve as a sort of holding pen for stuff that lands on the dining table and for whatever reason can’t be put away yet. About once a month, I look over the contents of the shelf and determine which items are ready to go to more permanent locations.

To my way of thinking, used furniture has three big advantages over new:

1. It’s already here; nobody has to cut down another tree or pull another barrel of oil out of the ground to produce it.

2. With the exception of valuable antiques, used furniture tends to be cheaper than comparable new items. I gave $85 for my dining table and chairs — about $400 less than the IKEA set I was considering, and probably more durable.

3. The antique stores here in Cape are all mom-and-pop operations located in historic buildings, which means when I shop there, I’m not only keeping more of my money in my community, but I’m also contributing to the upkeep of a historic property. WIN.

Emily

Tiny Tuesday: Repurpose a dishrack

I swiped an idea from my mom while I was helping her with the Thanksgiving dishes Thursday.

Mom and Dad redid their kitchen not too long ago, and their old dishrack wouldn’t fit well on the new counter, so they bought a new one.

Rather than throw out the old one, Mom stuck it in the bottom of one of the new cabinets, where it keeps the pan lids organized and easy to find.

Repurpose an old dishrack as a neat storage center for lids.

Given the weight of some of those lids, I’m not sure how well this would work with a flimsy plastic dishrack, but the one Mom used is made of heavy wire coated with plastic, and I am fairly certain it’s been around longer than I have, so it’s obviously pretty sturdy.

The rack takes up more room than the lids would if they were just tossed onto the bottom of the cabinet willy-nilly, but for me, part of the appeal with the tiny-house movement is its emphasis on organizing your things instead of just cramming them in wherever they’ll fit and forgetting where you put them. I love the idea of having all my possessions in close proximity to each other so I can access them quickly and easily, but if my cabinets aren’t organized well, I’m going to lose that advantage.

If I were using a dishrack for storage in my own kitchen, I’d probably use that space to the right of the lids to keep my big wok out of sight but within easy reach.

Take a look around your kitchen and see what items you could repurpose to organize your cabinets. I’ve found a streamlined space makes food prep faster, easier, and much more pleasant.

Emily

Make-It Monday: Grape slicer

Here’s another trick that’s been making the rounds on all the Pinterest-clickbait sites. I hadn’t really had occasion to use it until the other day, when I was making another batch of cranberry sauce, but it works well, with a few caveats.

Cutting through a zillion individual grapes takes FOREVER.

I add grapes to my cranberry sauce, because they taste good and give it a more assertive texture. The down side is that they have to be cut in half. Standing around cutting individual grapes in half is a pain, but I remembered a trick I’d seen for slicing cherry tomatoes and decided it probably would work just as well with grapes: Lay a handful of whatever small food you’re slicing on a cutting board, put a plastic lid on top of it, and press down gently while you run a knife just under the lip of the lid to slice through all of the grapes/tomatoes/whatever in one fell swoop.

Hold down the lid to keep the fruit from squirming out from under it while you slice.

In one of the pictures, you can see the edge of a big bread knife, which I’d thought might work well — most of the clickbait pictures I’d seen showed someone using a serrated blade considerably longer than the width of the lid — but in reality, big knives are unwieldy, and I’m klutzy, so I ended up sawing through the lid and making a mess of the grapes. I swapped the bread knife for a plain old steak knife, which was easier to handle and made a much neater cut without damaging the lid.

If you’re just slicing a handful of tomatoes for a salad, I wouldn’t bother getting out the lid, but if you have a large number of small fruits or vegetables to cut, it’s definitely worth rummaging around in the recycler for a plastic lid to speed up the process.

Emily

Vegetarian Friday: Vegetable stock

Remember a few weeks ago, when I told you to start saving vegetable scraps in a freezer container? It’s time to get out that container and reap the rewards.

This won’t be the prettiest thing we ever make, but vegetable stock is the basis for so many winter recipes, it only makes sense to prepare a batch now and keep it on hand as we head toward soup season.

You can buy vegetable broth at the store, but it’s usually outrageously expensive, comes in packaging that’s difficult to recycle, and often includes a lot of excess salt and preservatives. Vegetable bouillon is cheaper and involves less packaging, but the sodium content is through the roof, and many brands are made with monosodium glutamate or other chemicals that trigger problems for people with certain food sensitivities.

Our DIY version is free, tastes better, uses little to no packaging, and takes less than 10 minutes of actual work to prepare.

Ingredients

At least 2 c. vegetable scraps
Water

That’s all you need. The scraps can be mushroom stems, celery trimmings, onion peels, herb stems, baby carrots left over from a veggie tray, bell-pepper cores, or just about anything else you have on hand. Every time you cook, instead of tossing these leftovers into the compost bin, throw them in an old ice-cream tub or similar container and keep it in the freezer.

The Crock-Pot turns vegetable scraps into broth with minimal effort.

When the container is full, take two minutes to dump it into a Crock-Pot and cover the contents with water. Turn the Crock-Pot on and let it cook at least 4 hours on high or 8 hours on low. The longer it cooks, the more concentrated the flavor will be.

Shut off the Crock-Pot and leave it alone until the broth is cool enough to handle safely.

When the stock cools, freeze it in ice-cube trays, then store the cubes in a ziplock bag.

Strain the finished broth into a large pitcher, pour into ice-cube trays, and freeze. Pop out the finished cubes and store them in a ziplock bag or other freezer-safe container to use in any recipe that calls for broth. Compost the cooked vegetable scraps.

Emily

Eco-Saturday: Kitchen composter

As we work toward our long-term goal of building a tiny house someday, I’ve turned our small-but-not-tiny house into a sort of de facto laboratory for experimenting with products and tools that conserve space while increasing convenience. I’m blogging the ones that work here, in case anybody else is looking for ways to save space and time.

Over the years, I’ve tried several strategies for collecting compostable materials as we generate them in the kitchen.

I started with my mom’s tried-and-true approach: Keep an old ice-cream tub on the kitchen counter and throw peelings and cores  into it as you work. It’s not pretty, but it worked fine when I was a kid, and Mom and Dad were cooking for a family of five and sending a kid out to the compost pile with a full tub of scraps every day. It doesn’t work so well in a household with only two people in it, as the tub takes the better end of a week to fill up, during which time it will start to smell pretty raunchy.

To reduce the odor problem, I tried keeping kitchen scraps in a half-gallon Mason jar. The jar took up a smaller footprint on the counter, but it also had a smaller mouth (making it hard to scrape things into); depending on what was inside, it could look pretty gross; and while the lid sealed in odors well, it also encouraged anaerobic bacteria growth, which made opening it extremely unpleasant after a day or two.

I finally resigned myself to daily trips to the compost bin (which ultimately resulted in a lot of perfectly good scraps going down the garbage disposal during crummy weather), but one evening at work, when I was killing time after deadline, I stumbled across the Kitchen Compost Caddy on Amazon.

I really need to pay more attention to what's in the crisper. Throwing strawberries in the compost bin is just depressing.
I really need to pay more attention to what’s in the crisper. Throwing strawberries in the compost bin is just depressing.

It’s expensive (I gave nearly $60 for mine with shipping), but it’s really well designed, and I’ve used it a lot more than I expected. I like it because it doesn’t take up any space on my counter; the filter keeps it from smelling weird; and it has a little metal gizmo on it that holds the lid open while you scrape plates and stuff into it.

If it makes you feel better about the price, you can think of it as a steampunk garbage disposal.

I take ours out about once a week and empty it into the big compost bin at the same time I change the litter in the quail pen (thus striking a nice carbon-nitrogen balance in the pile) and hose it out while I’m refilling their big water dispenser.

Emily

P.S.: Nobody’s paying me or giving me free products to get me to endorse anything. I just posted this review because I bought this thing and liked it and thought somebody else might, too.

Eco-Saturday: Newspaper seed-starting pots

Last year, I showed you how to recycle Ro-Tel or enchilada sauce cans into planters for starting seeds. I’ve saved cans all year and have about three dozen to start the season — not bad, but not as many as I’d like. (I try to start at least a dozen of each tomato variety I intend to grow so I’ve got a good selection when it’s time to decide which plants go in the garden.)

To make up the slack, I’m recycling newspaper into biodegradable seed-starting cups.

I could do a step-by-step photo tutorial or a series of diagrams or some such, but the video embedded above is way better than anything I’m likely to come up with. What I particularly like is the simplicity of the design — you don’t need a background in origami to turn a sheet of newsprint into a neat little square planter. The size is also good; peat pellets and a lot of the commercially available planting flats are so small that your plants won’t have room to grow, and you’ll end up having to transplant them to keep them from getting leggy and rootbound long before the last frost date. These are big enough that your tomatoes shouldn’t outgrow them before Planting Day.

I’ll probably use two sheets of newsprint rather than one on mine to ensure they’re sturdy enough to hold up until April 15.

And yes, I know there have been some concerns about whether newsprint is safe to use in the garden, but Cornell University reports most newspapers have switched to soy- or water-based inks that won’t hurt your soil, your plants or you. I feel quite confident in saying heirloom tomatoes started in recycled newspaper pages and planted in your backyard are far better for the planet (and you) than Frankenfood grown on a factory farm 1,500 miles away and trucked all over creation.

In other news, here’s Day 4 of my giving-things-up-for-Lent project:

lent4

I love this skirt, but the “one size fits all” label in it is and always has been a lie. That drawstring is purely decorative; a wide elastic band holds up the top, and it’s much too tight for comfort. Too bad, because a solid black broomstick skirt is a handy thing to have. Maybe someday I’ll find one in my size. In the meantime, I’ll toss this one in the thrift-store box for a thinner person to enjoy.

Emily

Lent

Sorry I haven’t posted in a while. Thanks to a quirk of the schedule, I’m now on Day 9 of a 10-day stretch with no days off, and on top of that, we’ve had several nights of subzero temperatures that forced me to move the quail into the garage; the better end of a foot of snow, which required quite a bit of digging out once the streets were cleared (and a 1.5-mile walk home from work in 5-degree weather while we waited, because getting a ride to the office at 2 p.m. is much easier than getting a ride home at 11 p.m.); and outrageously dry air that gave me terrible headaches two mornings in a row before I figured it out and plugged in the vaporizer. Anyway, here I am, and I’ve got an idea to share.

Today Yesterday was the first day of Lent, and somebody on Twitter started a thread asking people what they were giving up.

I’m not Catholic, so I don’t usually observe Lent, but as I was looking at another tiny-house website during some down time at the office, it occurred to me that I really need to start shrinking my inventory of unnecessary crap around here.

One thing led to another, and as I waited around for AP to send over a story I needed for the front page, I hatched a plan: Instead of giving up one thing for Lent, I’m going to take another positive step toward shrinking my environmental footprint by giving up one thing per day.

Once a day, probably right before bedtime, I’m going to go through the house, find one thing I don’t need and don’t use, and donate it to someone who can put it to good use.

For Ash Wednesday, I am giving up this:

lent1

Clock radios are nice. But I haven’t used this one since I got my iPhone, which has a perfectly reliable alarm clock built right in, and I’m not likely to use it again, so out it goes.

What are you giving up for Lent?

Emily

Befores and afters

I spent most of today searching for a paper towel dispenser I could mount below my cabinets. I have no idea why, but they’ve gotten rare as hens’ teeth. Why everybody wants to take up precious counter space with a paper towel holder is beyond me, but the kind that sit on the countertop were all I could find everywhere I went. We searched six stores before we finally found one at Menards.

Another thing that’s become scarce: Those three-tiered hanging fruit baskets like everybody’s mom had in the kitchen when we were kids. I try to keep fruit on hand for snacking, and I wanted a set of those hanging wire baskets like we had in our kitchen when I was little. No dice. I finally had to order a set from Amazon, because I couldn’t find them locally.

Anyway, after I rustled up a towel dispenser, I set to work cleaning the kitchen cabinets. My spice collection is ridiculous and was taking up half a standard cabinet and an entire corner of the counter. While I was at it, I organized a junk drawer. Here’s my handiwork, with a couple of fun little mini-recycling projects included:

This corner was just ... yeesh.
This corner was just … yeesh.
I can feel my blood pressure drop when I look at this countertop now.
Stuff fits much better when you put it in proper storage containers. Even if you have to stash the noodles in a cotton-candy tub.
Good luck finding anything in that mess. Look at all that junk. And my last attempt at organizing the spices resulted in that gray tray, which corralled some of them nicely but made them impossible to get in or out of the cabinet.
After. I merged a bunch of duplicate containers, took all the stuff that was stored in bags and put it in jars, and moved a bunch of spices to that new shelf I built yesterday, as the configuration of the cabinet was better for storing cans.
Junk drawer. Standard issue.
Yes, I sorted all the hardware into an old candy box. You know I'd be thrilled if Ron brought me a box of hardware for Valentine's Day.
Yes, I sorted all the hardware into an old candy box. You know I’d be thrilled if Ron brought me a box of hardware for Valentine’s Day.

I was kinda proud of myself for coming up with that candy box thing. And yes, that’s a sonic screwdriver in the drawer. Ron bought it for me last year. It’s an actual screwdriver, too. I love it.

Hope your day was productive, wherever you are.

Emily

Eco-Saturday: Cheap all-purpose cleaner

citrusweb

I use vinegar to clean almost everything. I don’t mind the smell, but then again, I’ve been known to order Pickle Pops by the case. Some people balk at using vinegar as a household cleaner, because the smell can get a little intense.

Enter this excellent idea I found somewhere online (Pinterest, probably) for recycling citrus peels into all-purpose cleaner.

You will need:
A good-sized jar with a lid
Distilled vinegar
Citrus peels

Cut up the peels into manageable chunks. Roll up each piece of peel as tightly as you can, shiny side out, and put it in the jar. (Rolling causes the pores of the outer skin to release citrus oil, which is the key ingredient in those pricey biodegradable cleaners you get at the health-food store.)

Cover the peels with distilled vinegar, close the lid tightly, and let it sit on the counter. Add peels as you get them. Every time you add some peels, add enough vinegar to cover them. Any kind of citrus peel will work — orange, lemon, lime, grapefruit, etc. I bought a juicer recently and caught a sale on grapefruit, so I had a lot of grapefruit peels handy. I also had some Clementine oranges and a lime, all of which went in the jar.

Let the jar sit for at least a week after the last addition of vinegar. The longer it sits, the more it will smell like citrus instead of vinegar.

Strain the vinegar into a spray bottle and use it as you would Windex, Formula 409 or similar multipurpose cleaners. The peels can go in the compost pile. (Unless you’re vermicomposting, of course. Citrus and vinegar are both too acidic for worms.)

Emily

Eco-Saturday: Recycled dog sweater

Here’s an easy way to recycle an old sweatshirt into a cute little sweater that will earn you the undying contempt of your favorite small dog. I swiped this idea from my mom, who made this little sweater for Cleremont, my sister’s Maltese.

Excuse the fuzzy picture. Cleremont wouldn't stand still long enough for me to get a decent shot.
Excuse the fuzzy picture. Cleremont wouldn’t stand still long enough for me to get a decent shot.

Maltese are single-coated dogs, meaning they don’t have that extra layer of dense fur you find on working breeds such as collies and Labradors. In the winter, Cleremont’s fur isn’t quite thick enough to keep him warm when he goes out, so Mom repurposed the arm of an old sweatshirt to solve that problem.

You don’t need any sewing skills for this project. If you can operate a pair of scissors, you’re set.

Cut the arm out of an old sweatshirt. The cuff will become the neckhole. Just below the cuff, cut a couple of small holes for your dog’s front legs. (You’ll want to measure the distance from the dog’s neck to its front legs to get the holes in the right place.)

Measure your dog from its neck to its tail. Cut the sleeve to that length, then trim it at an angle to allow clearance on the underside so the dog doesn’t pee on it.

Cleremont gets a little attention from my dad while modeling his sweater. He's a pretty good dog.
Cleremont gets a little attention from my dad while modeling his sweater. Notice how the side of the sweater is cut at an angle to cover as much of his back as possible.

Put the sweater on the dog. (Try to avoid being bitten in the process.) You may need to take it back off and make adjustments once the dog tries it on and you see how it fits. Try not to make too many adjustments. Your dog already hates you for making it wear clothes. Don’t push your luck. A cat would be plotting to kill you in your sleep by this point.

Emily